So, you’re thinking of building a pool. Awesome! Of all the DIY projects I’ve done in my life, this is definitely one of my favorites.
In this guide, I’ll walk through the steps of how to build a shipping container pool so that you can enjoy swimming in style all year long.
Determine the Location of Your Pool
First, you need to determine the location of your pool. The ideal spot would be at least 10 feet away from any structures and fences.
A good rule of thumb is to place it at least 20 feet from the house and 10 feet from other objects. If your property has a slope or incline, you may consider placing it on an elevated area or a concrete slab for safety reasons.
Next, you need to consider where water will be collected when it rains and how that water will drain away from where you plan to place your container pool.
For example, if there are no gutters or proper plumbing nearby, there could be flooding issues when heavy rains come through.
Get the Necessary Permits
Getting the necessary permits from your local government before building a container pool or buying a shipping container pool kit is important. Permits are required for any pool, but the requirements can vary depending on where you live.
Before starting construction, contact your city or county office and ask about any local requirements that may be in place. You might also want to contact your insurance agent to let them know what you’re planning on doing.
If they already have knowledge of the project and see no potential issues with it (e.g., overcrowding), there won’t be any surprises later on down the line when they call in their initial inspection visit.
Choose a Contractor if You Plan to Hire One
If you want to hire a contractor, make sure they have experience in using a shipping container pool kit. Check with local government offices and visit construction websites to find suitable contractors in your area.
Once you’ve found some candidates, do your research. Check their Yelp reviews, speak with past clients, and ask for references. If possible, ask for their portfolios so that you can see their work firsthand.
Your contractor must know what they’re doing. Even an experienced contractor can make mistakes. Ask them how many pools they’ve installed and what kind of pool it was (above ground or in-ground).
A good rule of thumb is to avoid any company that offers a “one-size-fits-all” approach for pools. You’ll probably end up paying too much money for a shoddy job done by unqualified people.
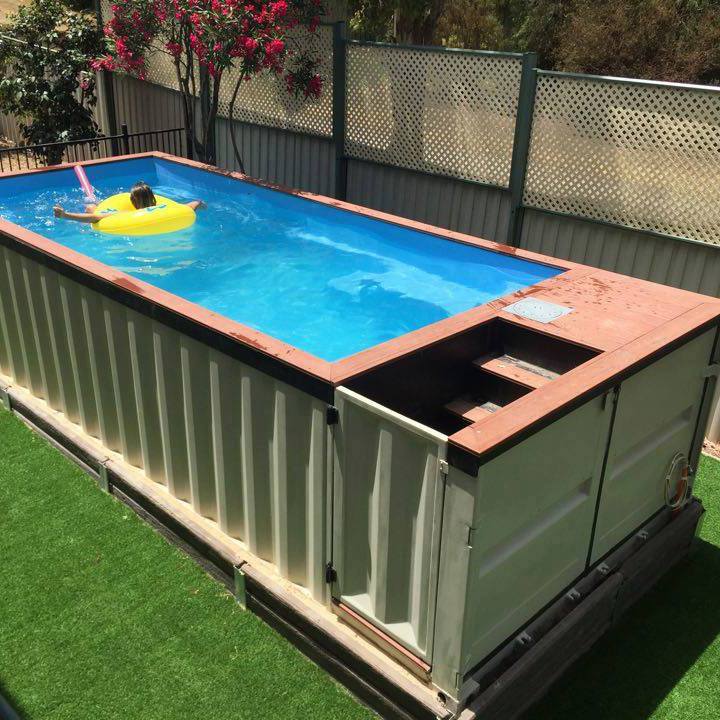
Select the Size of the Pool and Order a Shipping Container
Before you order a container, it’s important to determine the size of your pool. This will ensure that you purchase a container with the correct size and don’t end up wasting money on multiple containers.
You can fit a full-size 16-ft shipping container into most backyards, but if you’re looking for something smaller, there are also 12-ft and 8-ft models available.
Your container size should depend on what type of pool you want and the available space in your backyard.
If you want a pool that’s big enough to swim laps in, then you should probably go with a 16-ft container. If you just want a place to cool off and relax, then an 8-ft or 12-ft container should suffice.
Ensure That the Container is Level Before Filling It With Water
Make sure that your shipping container is level before adding water. You can use a spirit level or, if you don’t have one, use a straight edge and pencil to mark where the waterline would be on each side of your container.
Once you have these two points marked, place them together and see how much space there is between them.
If it looks like there might be more than an inch difference in distance between where the two lines meet each other, then it might be time for some shimming!
Again, placing the container on a pre-made concrete slab will make this step much easier. If everything looks good and the waterline is level, then it’s time to start filling up your container pool!
Test the pH Levels of the Water Regularly
It’s important to test the pH levels of your pool water regularly, as this will ensure that it’s safe for swimming. pH levels that are too high or low can cause skin irritation, red eyes, and other problems.
Add Some Finishing Touches to the Project
You can also add steps and ladders or even a built-in bar that will make your pool more convenient for swimming. Just make sure that whatever you add is securely fastened to the container so that it doesn’t come loose and pose a safety hazard.
Shipping Container Pool Kit Tip: When you are ready to fill your container with water, you will want to make sure there are no sharp edges or anything that could puncture your liner.
Using a rubber mallet, gently hammer any protruding nails into the wood, so they don’t puncture the liner. If possible, have someone else help out by placing their feet on top of the container while you hammer in any nails that remain sticking out.
How to Build a Shipping Container Pool: Conclusion
Building your own pool through a shipping container pool kit is a great way to have a one-of-a-kind swimming experience. The entire process may seem intimidating at first, but with the right planning and expert advice, you’re sure to be successful!